Combat-Free Subterranean Exploration
Mining in these parts can be dangerous. Yet we make sure our players stay in the safe boundaries, in any case of danger or hazard we encourage players to pay up and hire some professionals to deal with them.
Project Tallus Case Study
a system design documentation
“My pickaxe is my lineage, I will extract every ore as long as I am needed” – Boney Dwarf Guy, to his mirror.
A technical systems design and architectural case study exploring deterministic procedural generation, mathematical depth scaling, and organic session loops for an infinite and intricate mine network.
Mining in these parts can be dangerous. Yet we make sure our players stay in the safe boundaries, in any case of danger or hazard we encourage players to pay up and hire some professionals to deal with them.
No-monsters doesn’t necessarily mean you can wander around freely, it is still very deep underground, did you pack your Sunstones? Whet your Pickaxe? Took out your socks from the back so you can have enough Inventory? Because these three have limits that will make players have to return to the workshop.
We are working on preparing a mixtape for you as soon as we find the cassette player. Cause while you are sipping your coffee and swinging your pickaxe freely, you’re gonna enjoy breathing in the humid weather down here, we don’t rush you to explore, pick your own floor and explore at your own pace!
It’s fairly easy you know... You take your pickaxe, enter the mine, explore the mine until your ran out of light, durability or inventory space. Then whenever you feel like you coming back you just channel magically and teleport back to the workshop. Next time you enter you can use the activated elevators located at every 10th floor.
The mining session needed pressure, without a countdown or combat. Players needed reasons to return to the workshop while still feeling that the decision to leave was theirs.
Built the session around limited resources rather than a fixed timer. The player enters from the workshop, explores and mines until their available limits make continued descent increasingly unattractive, then returns to base. Milestone elevators provide persistent shortcuts between sessions.
Session length is shaped by player decisions and resource pressure rather than a forced countdown.
Lifecycle of a single session, governed by 3 organic player limits, where departure can be triggered at any time during the exploration phase.
Main location of the Crafting* system. Base of operations for Blacksmithing, where different refinement stations and storages are located and items are crafted. Backroom to the Shopkeeping* system. Players use the main descend shaft here to enter the mine or directly select a floor with an active elevator shaft.
The floors inside the mine network are procedurally generated, the level you explore in earlier sessions will look different, on top of that, it goes deep... to infinity. Yes, infinity. The first 200 levels though are where the main action is and all the new content is there. We will not stop you from going deeper, you may want to challenge yourself but you’ll see those depths are not as efficient.
A 200-floor mine needed to feel progressively diverse without requiring every floor to be manually authored. At the same time, depth must affect resources, environment and tool progression keeping the diversity.
Used depth profiles to continuously control environmental characteristics and resource availability, while milestone floors are kept authored and persistent as landmarks. L1–L200 contains the designed progression; further depths remain technically scalable beyond the authored boundary/
Depth becomes a continuous system of environmental and economic change rather than a collection of isolated levels.
Level specific map of the mine network, each floor level has its own unique identity called profile that is used as a procedural generation guide.
Familiar, safe, grounded baseline mining environment establishing core mechanics.
Ladder & rope descent. Next checkpoint at L10.
Pickaxe Tier is not directly tied to the biome regions but have the intended most optimal depth bands. Necessary upgrade blueprints can be found in specified depth bands for each tier.
| Pickaxe Tier | Optimal Depth Band | Blueprint Drop Range |
|---|---|---|
| Tier 1 | L1 – L15 | Starting Equipment |
| Tier 2 | L16 – L39 | L10 – L15 |
| Tier 3 | L40 – L75 | L30 – L39 |
| Tier 4 | L76 – L141 | L65 – L75 |
| Tier 5 | L142 – L200 | L130 – L141 |
We made a little toy here so you can feel what it’s like to mine -though approximately- when you’re down there. Select the floor, the pickaxe you have, the resource you want to hit and it’ll show you what expects you. You can find the formulas inside the drawer.
Deeper resources needed to become harder to extract without making mining progressively slower at every stage of the game. A stronger pickaxe also needs to feel meaningful without making earlier resources completely trivial.
Separated depth scaling and tool progression. Resource resistance increases with depth while matched-tier pickaxes compensate for that increase, targeting a relatively stable Time-to-Mine range. Tool condition further modifies performance without introducing a traditional break state. More variables to tweak meant more control on the scale.
Depth increases extraction pressure while tool progression make sure efficiency stays similar, keeping mining relevant throughout the authored progression.
This interactive tool uses the approximate formulas used in the game with unbalanced versions. Instead of reading and looking at cryptic formulas, we provide the sensation of the mining we intended to achieve.
* Grid dynamically filters native resources across L1–L200.
Tier 1 Tool vs Tier 1 Deposit • Matched Efficiency
* All formulas subject to balance tuning after actual playtests and does not reflect the final results. Reworks may and will happen regarding the approach and calculations of these formulas
The graph displays the efficiency of each pickaxe tier on any given floor. The painted area indicates target matched pacing band which is the intended TTM for each tier.
* Curves will be subjected to balancing changed after the playtests
The pickaxe never truly shatters and rendered disabled. However its durability faces degradation in two phases.
Primary Durability > 0. Standard throughput
Triggered when Primary = 0. Capacity equals 100% of the Primary Pool, half of the original damage.
Triggers when the Secondary Pool is depleted. Quarter of the original damage. Endless Pool.
* Pickaxe can be repaired both in the workshop and randomly encountered workbenches in the mine. Difference mainly being the cost
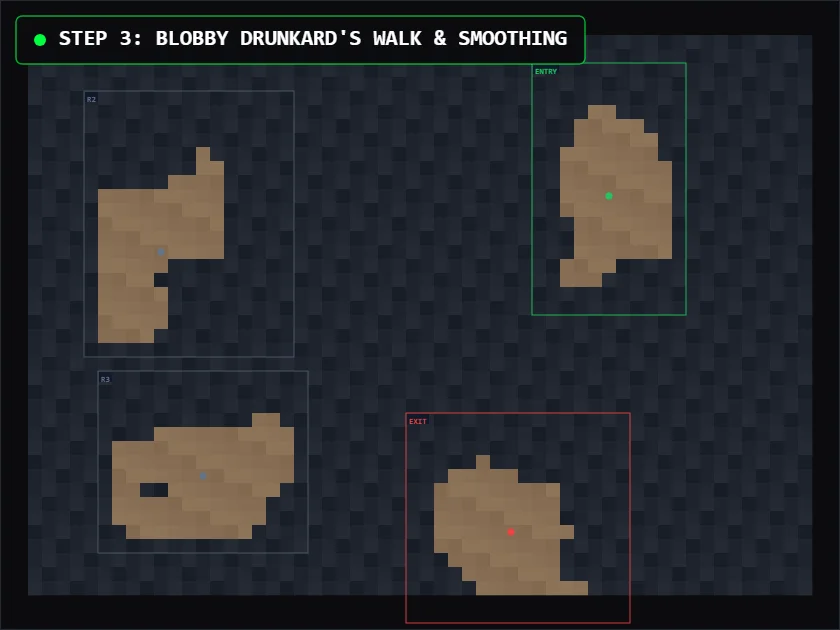
This mine is endless, so it’s not possible to descend from the same shafts every time, therefore you see different layouts each time unless they’re kept in memory. Here, we’re explaining how that magic happens under the hood, each step we add a little detail for you each as important as the other. The end product? The same feel with a different map.
The mine needed to generate different layouts across visits. Storing every generated floor in memory would scale poorly as the player descends. Also a method needed to make floors not repetitive so players can visit the same floor every session while finding complete different and fresh layouts.
Generate floors deterministically from their depth and generation identity. During a session, maintain a five-floor active memory window and reconstruct evicted floors from their deterministic identity if they’re revisited after the flush.
Generated floors can be discarded from active memory and reconstructed later without feeling the same exact floor.
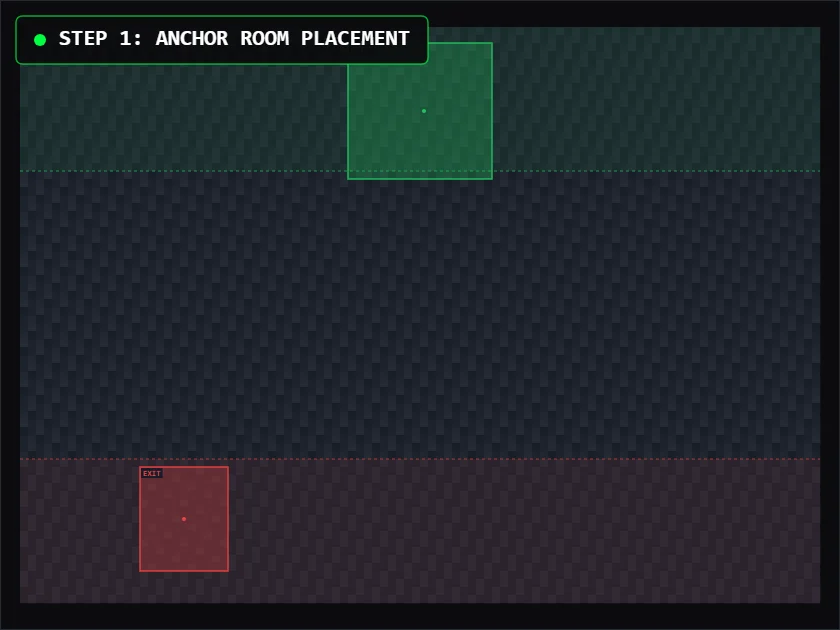
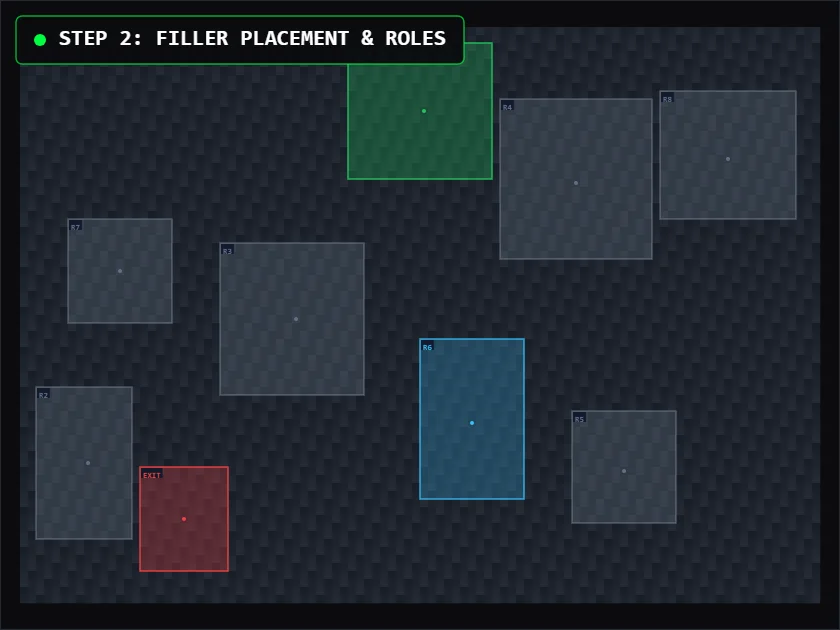
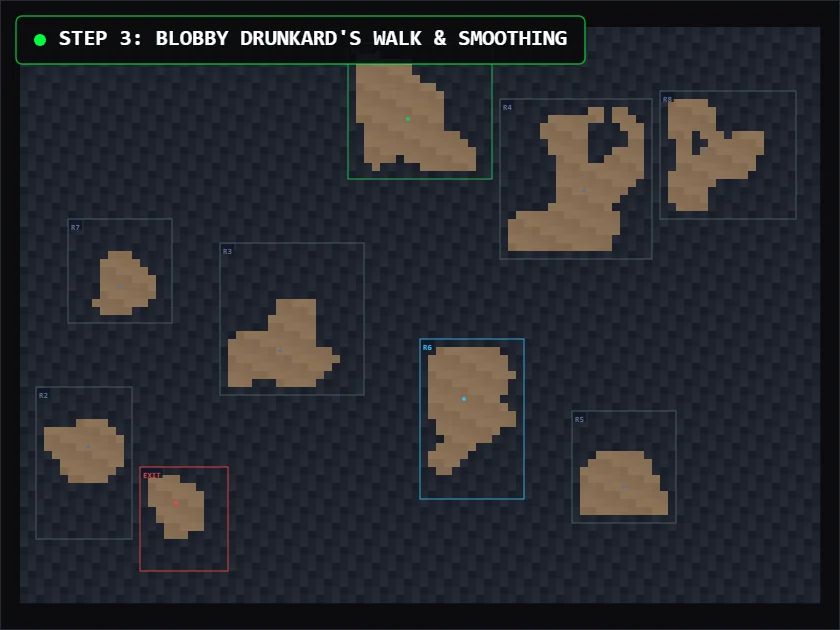
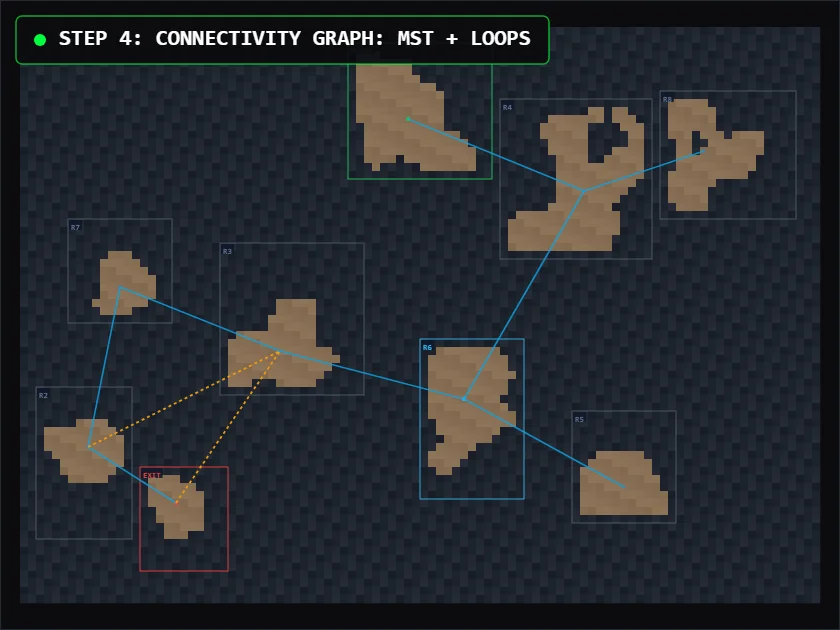
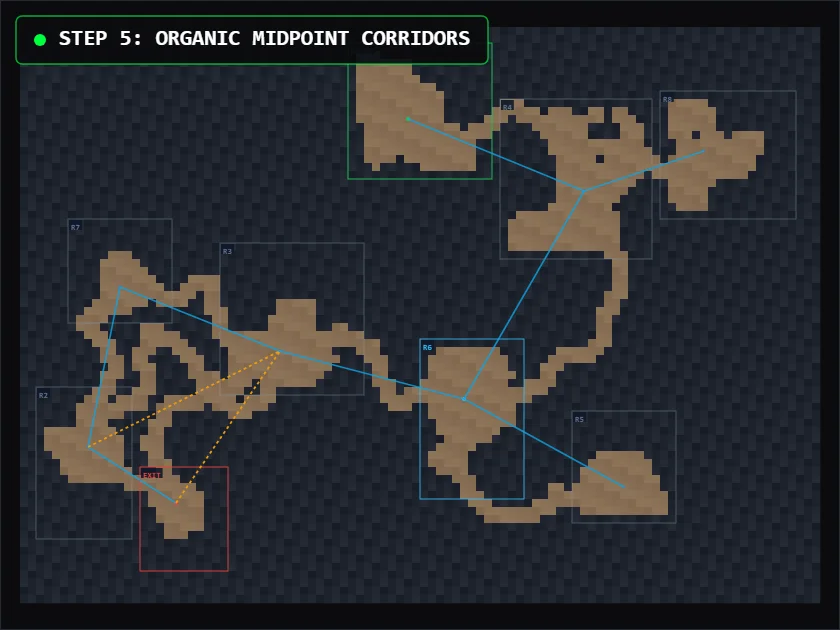
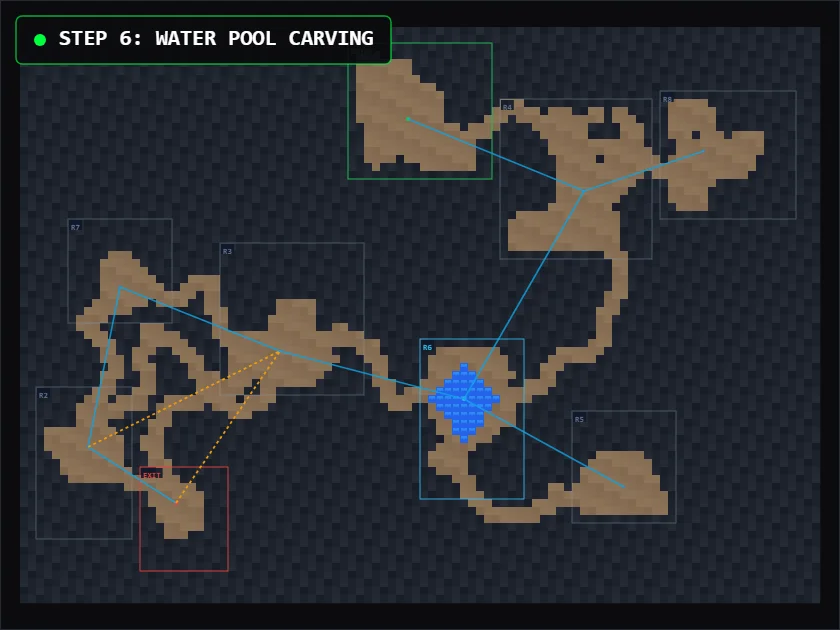
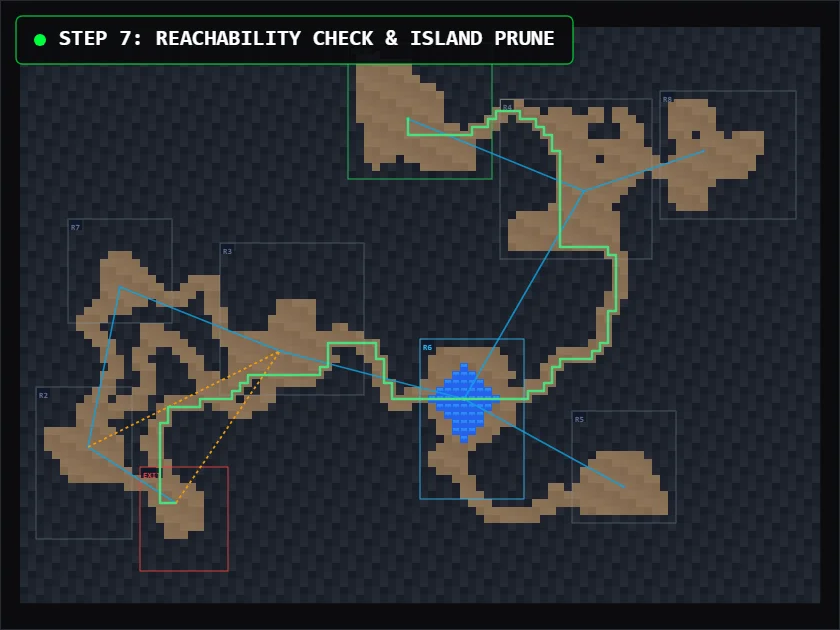
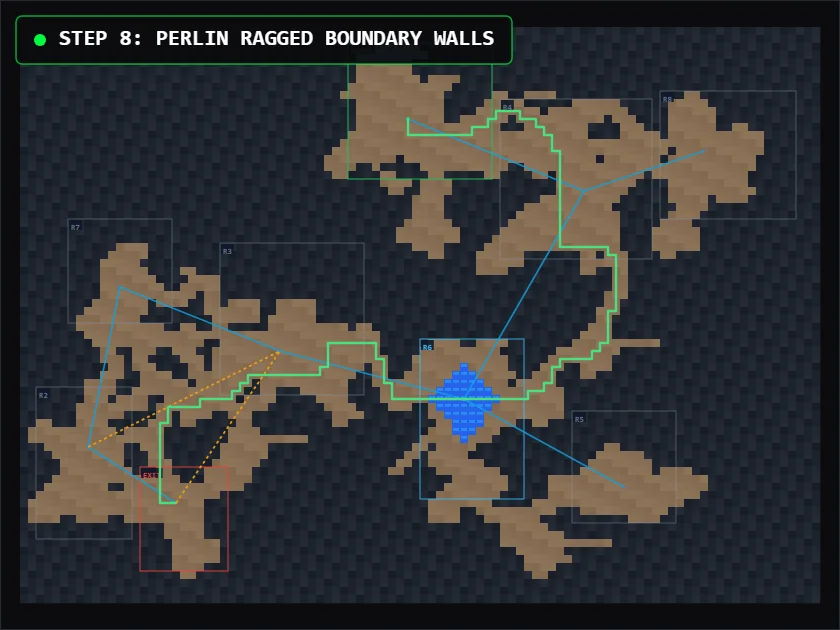
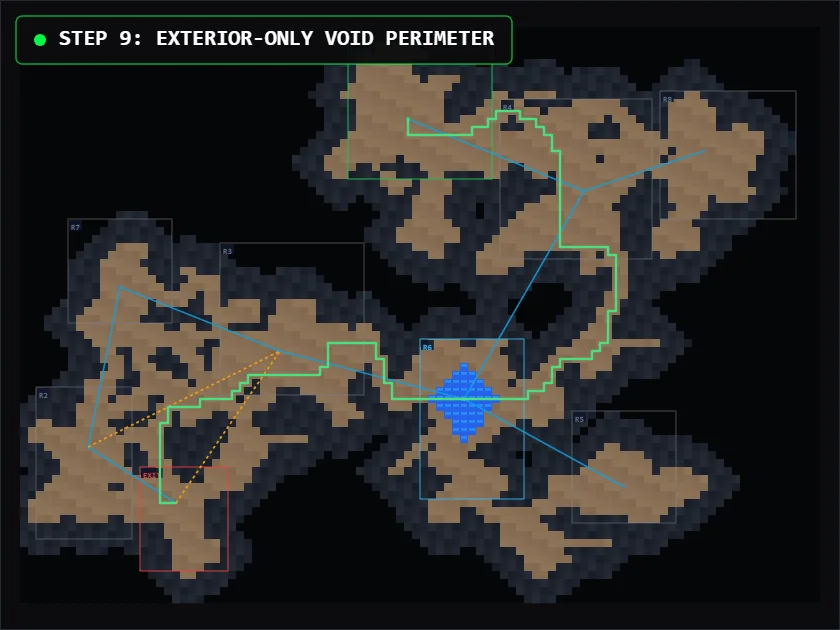
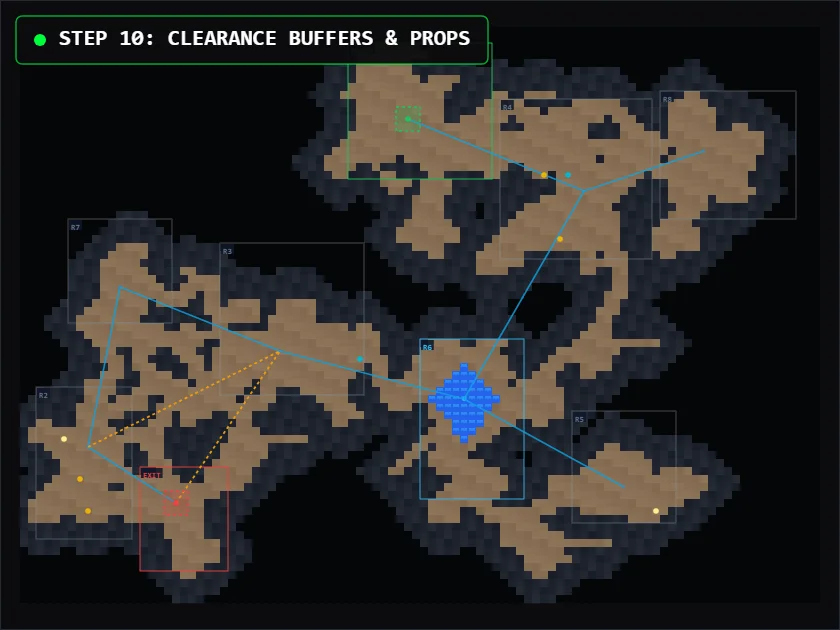
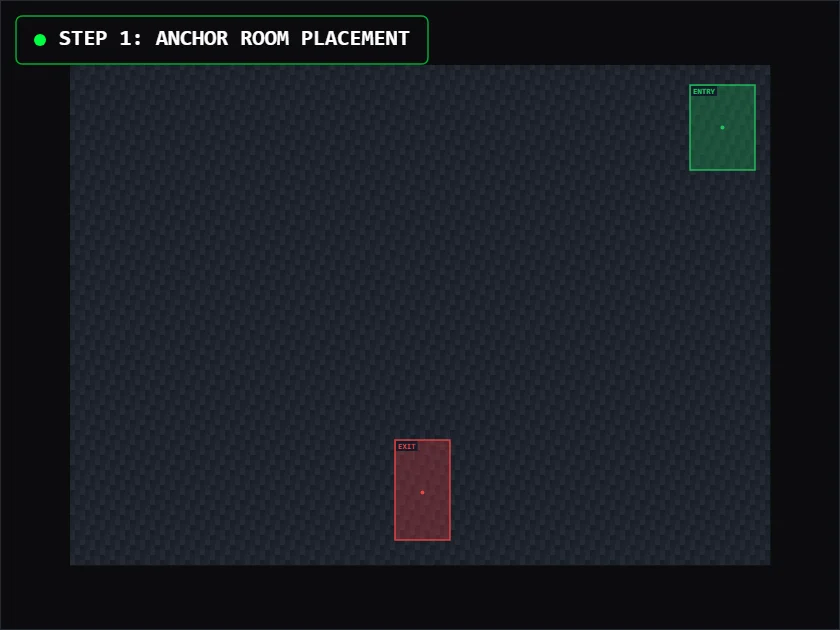
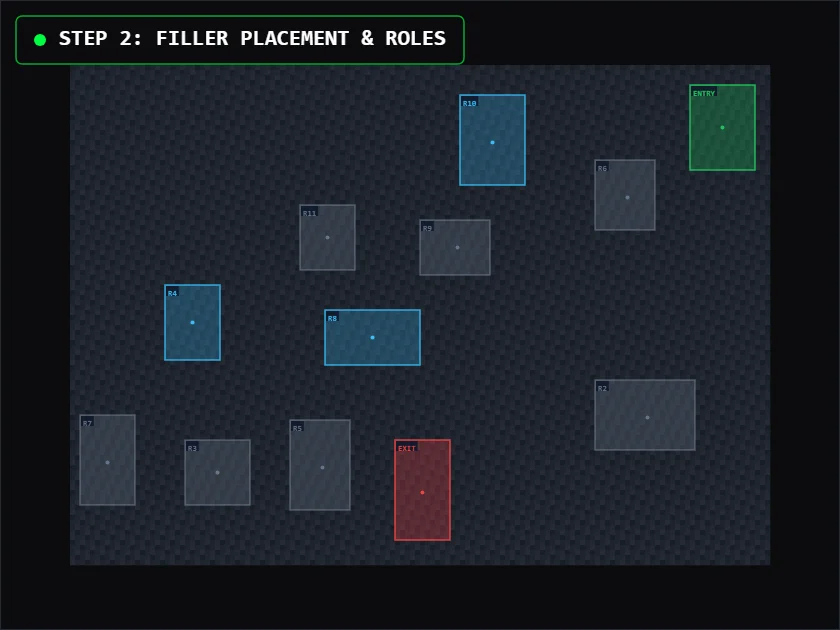
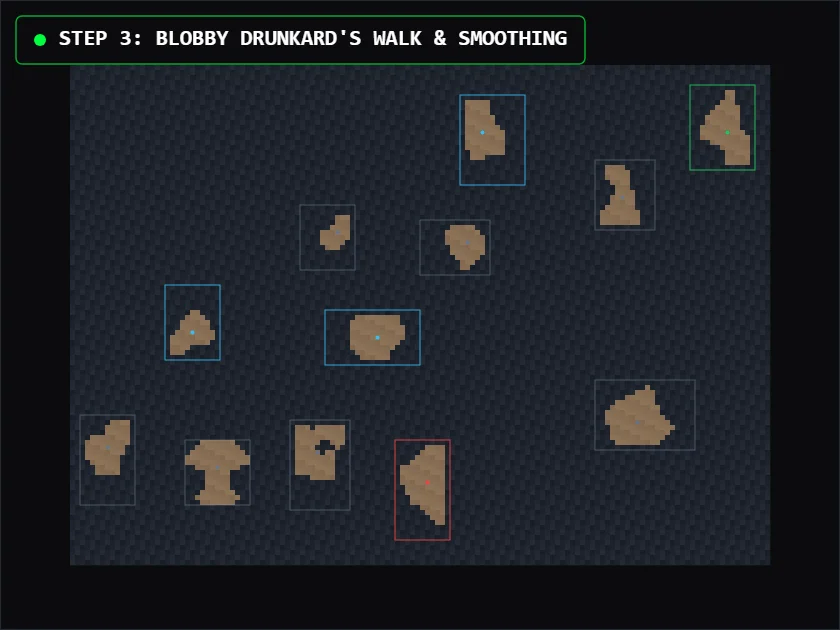
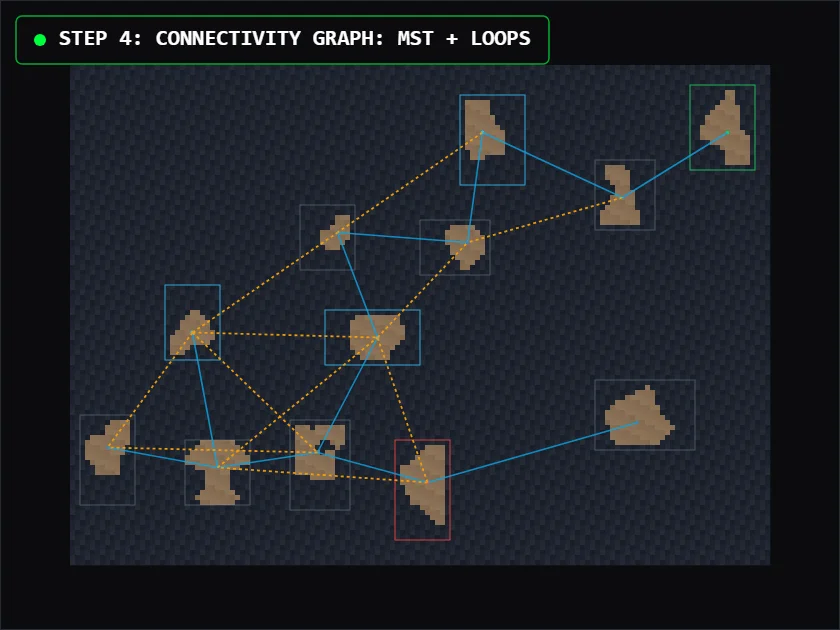
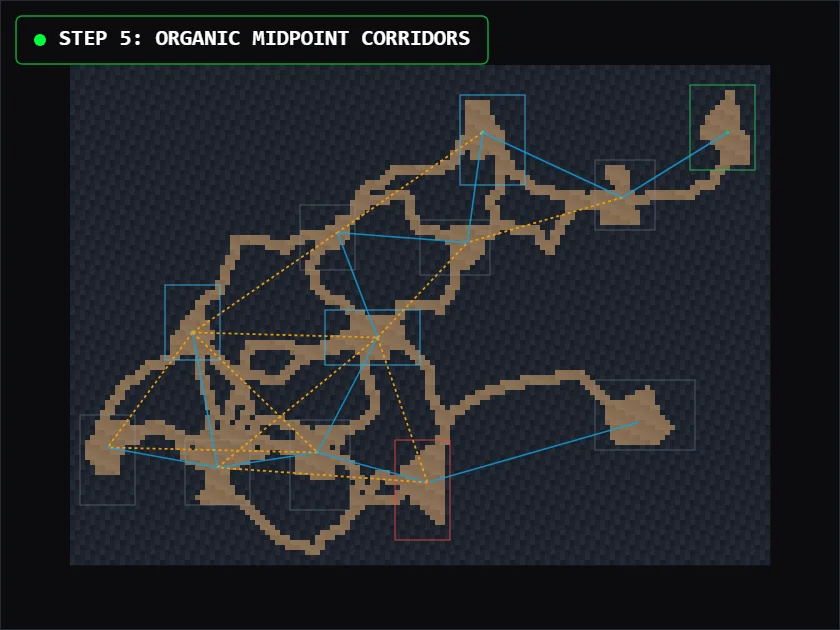
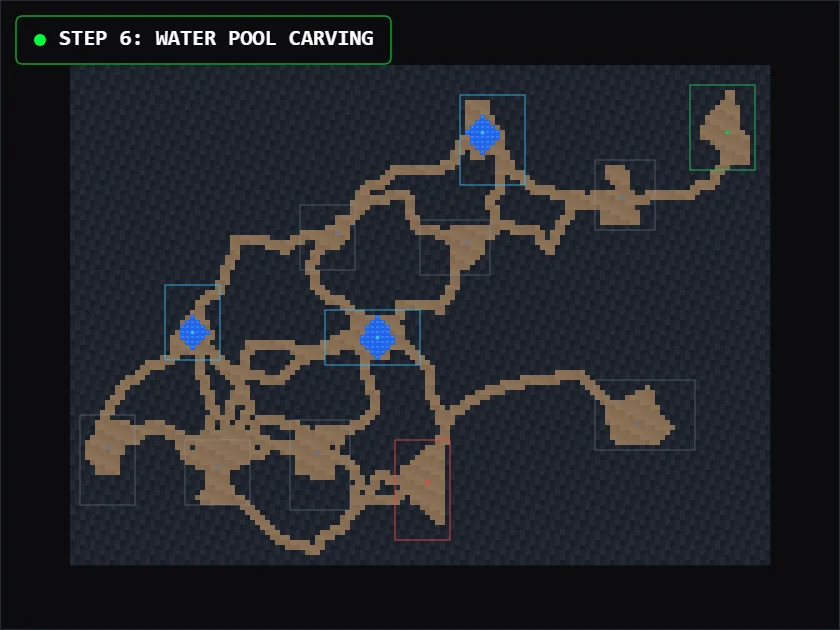
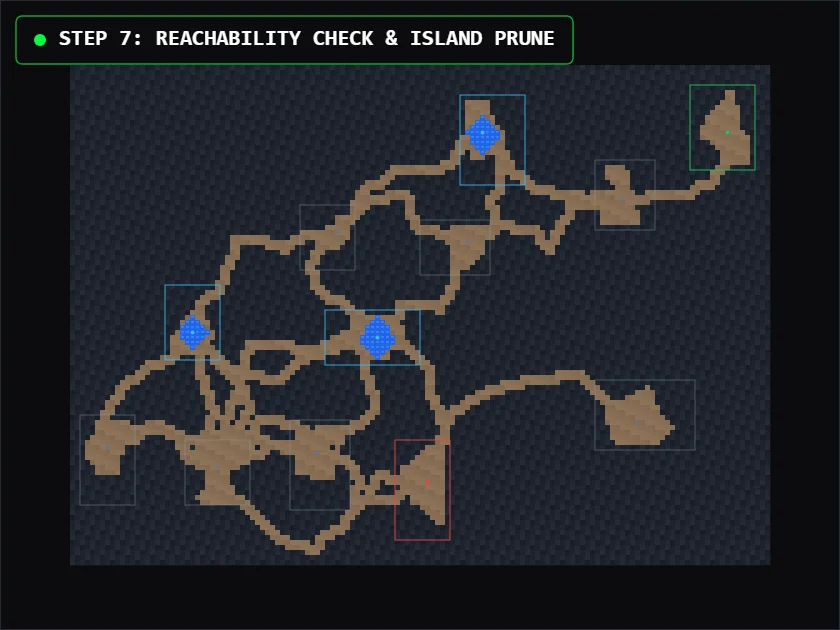
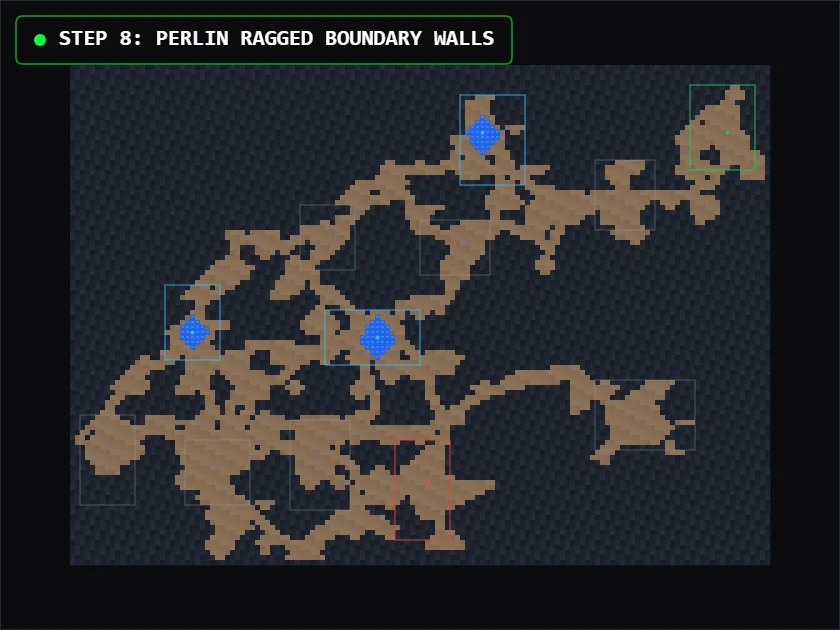
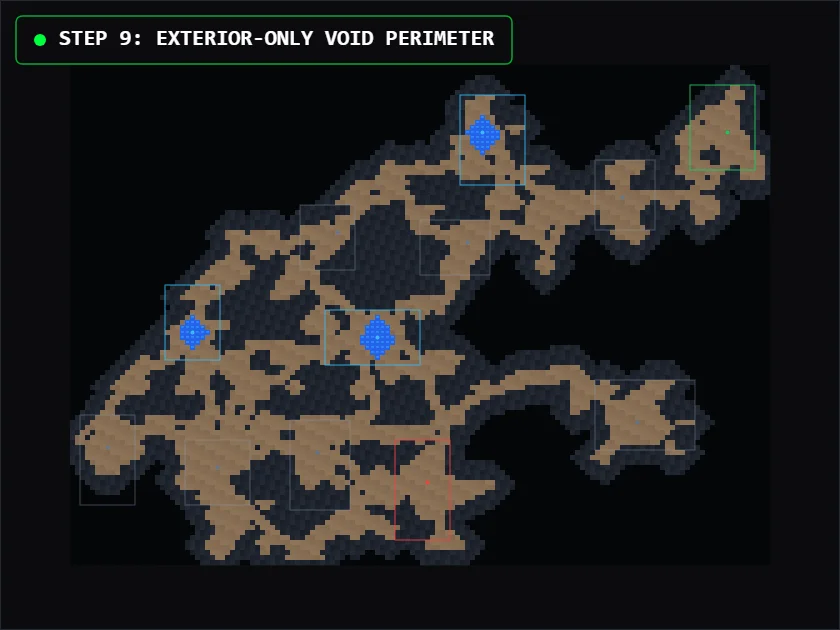
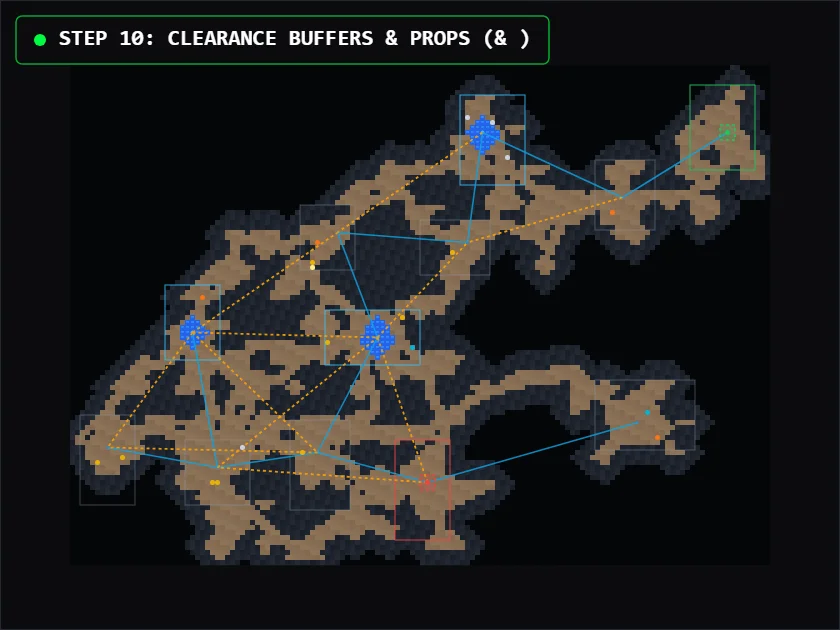
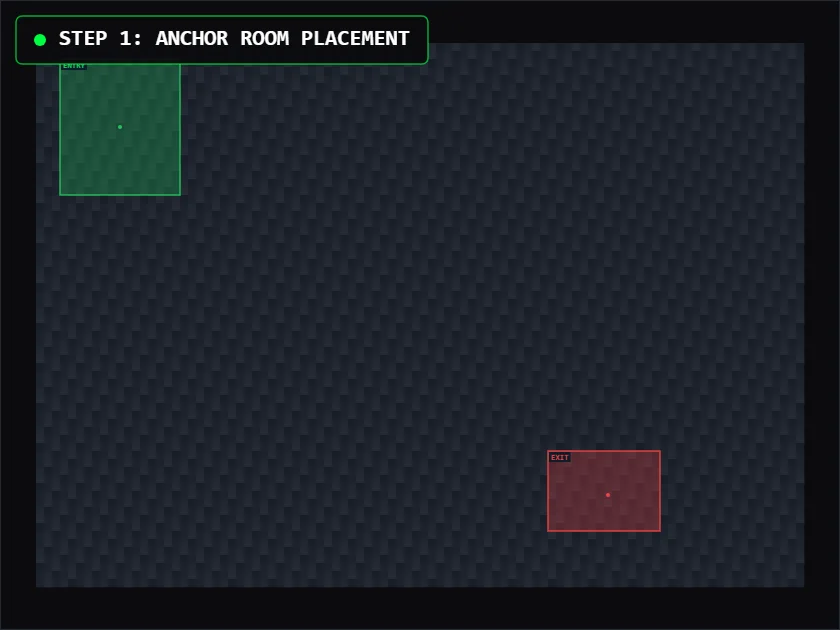
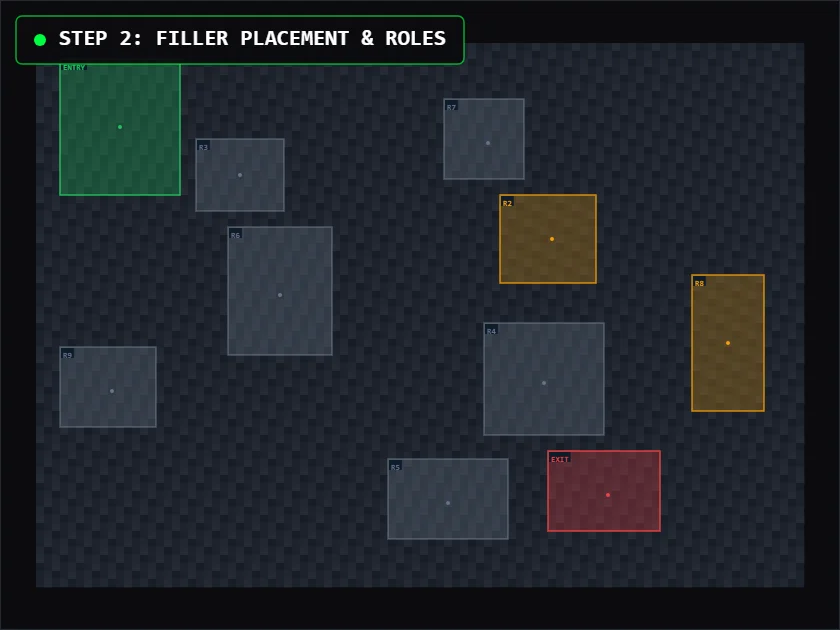
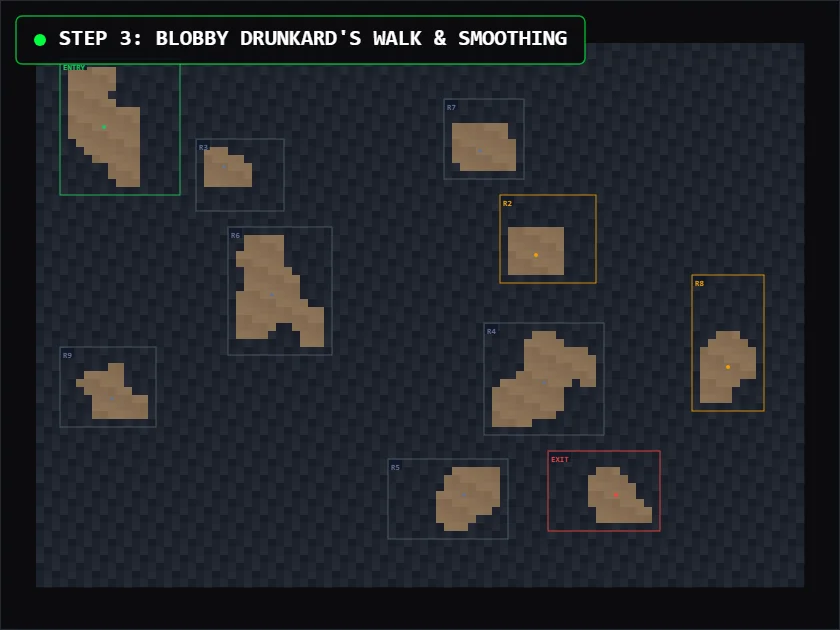
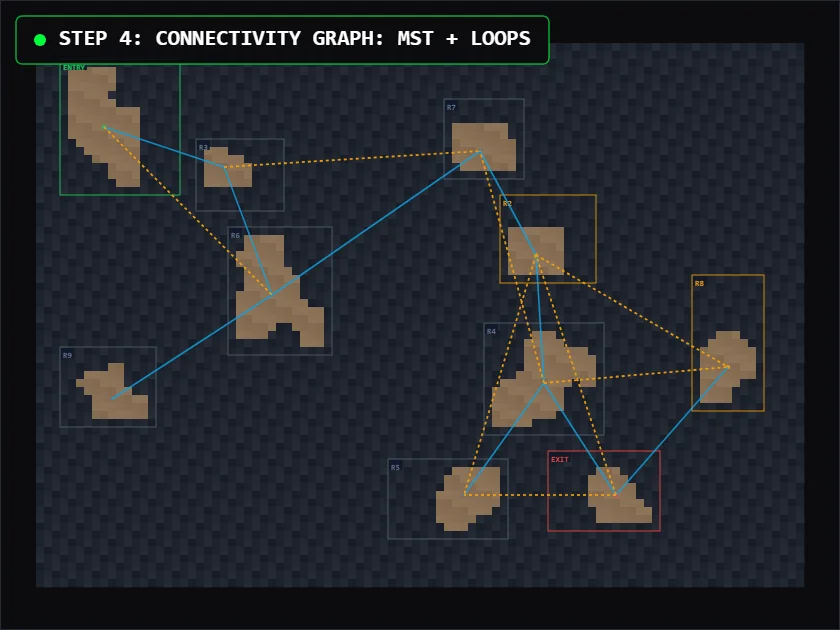
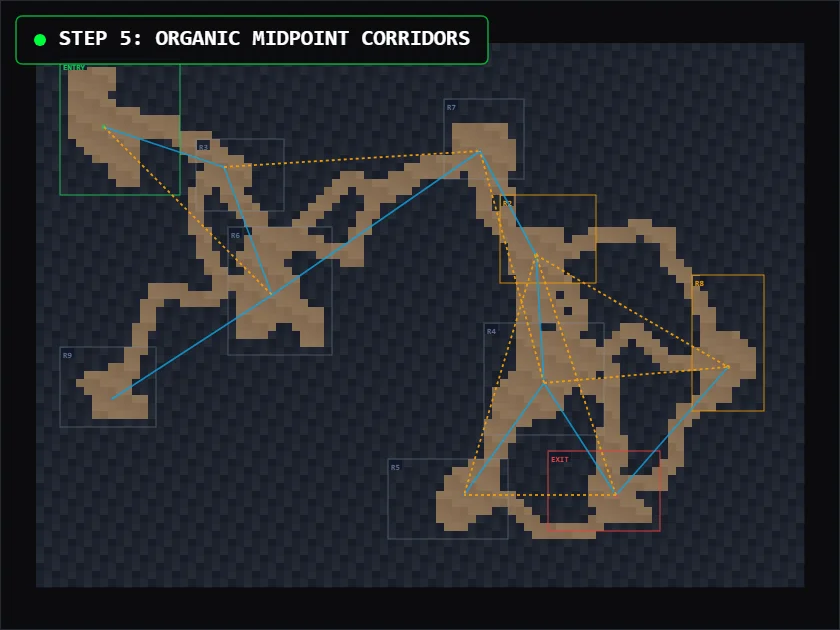
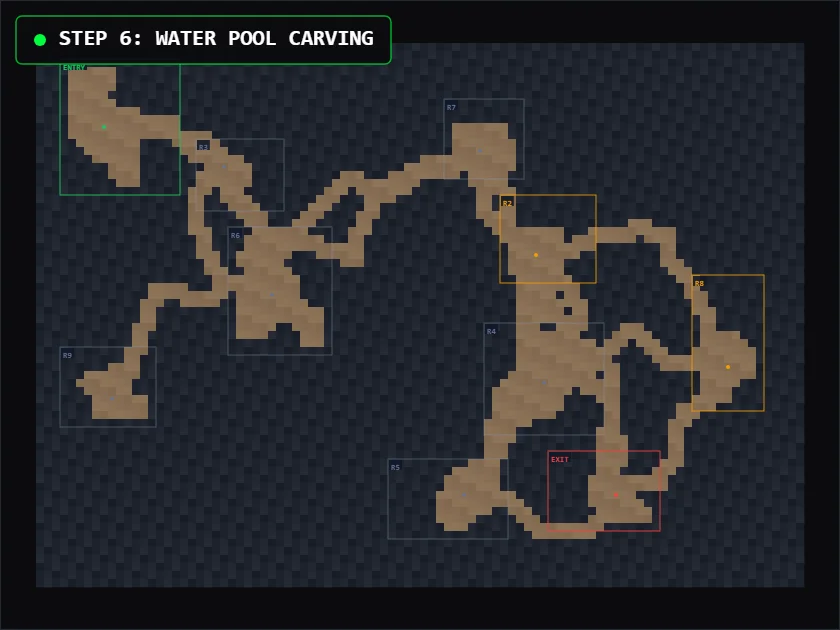
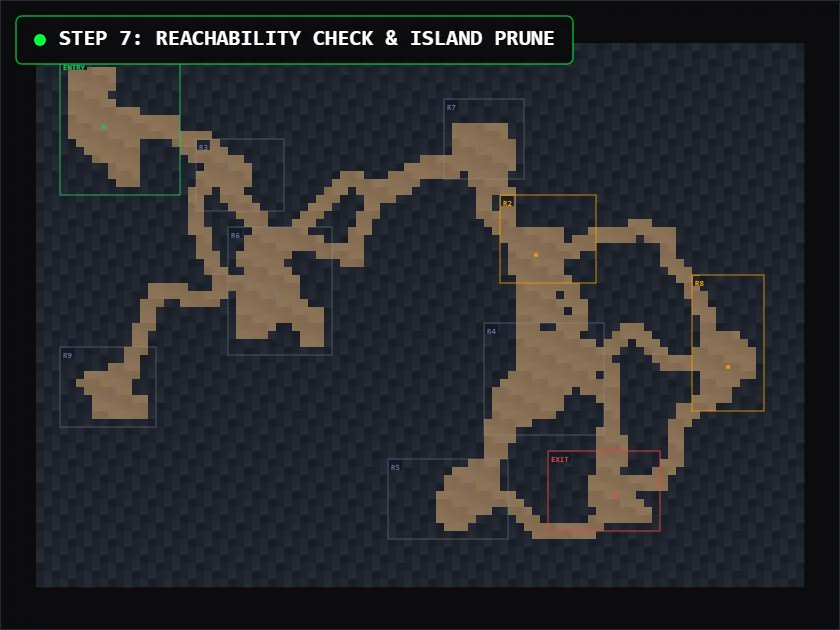
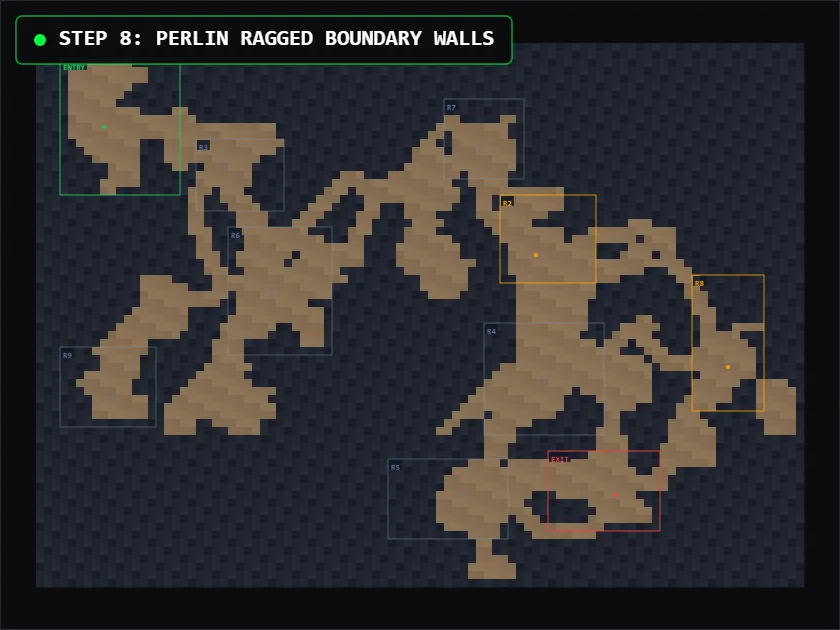
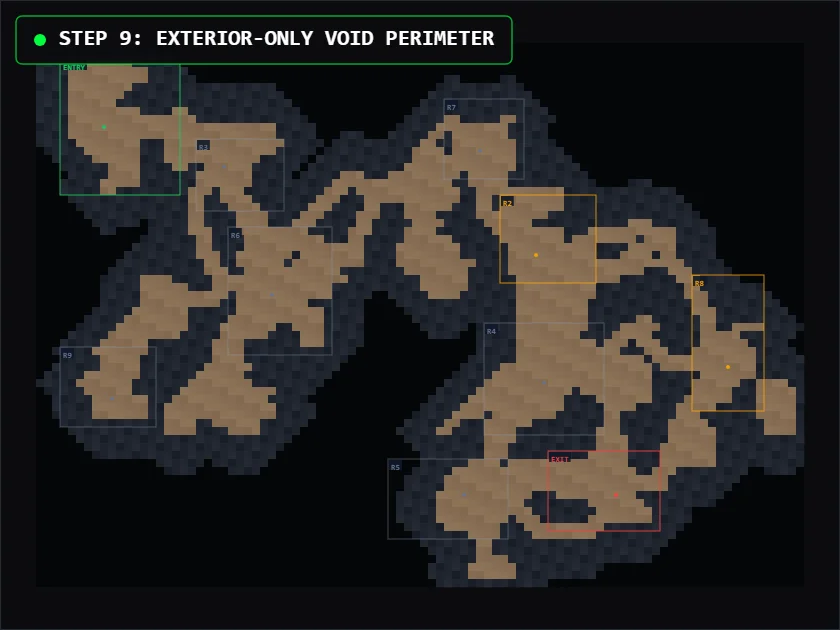
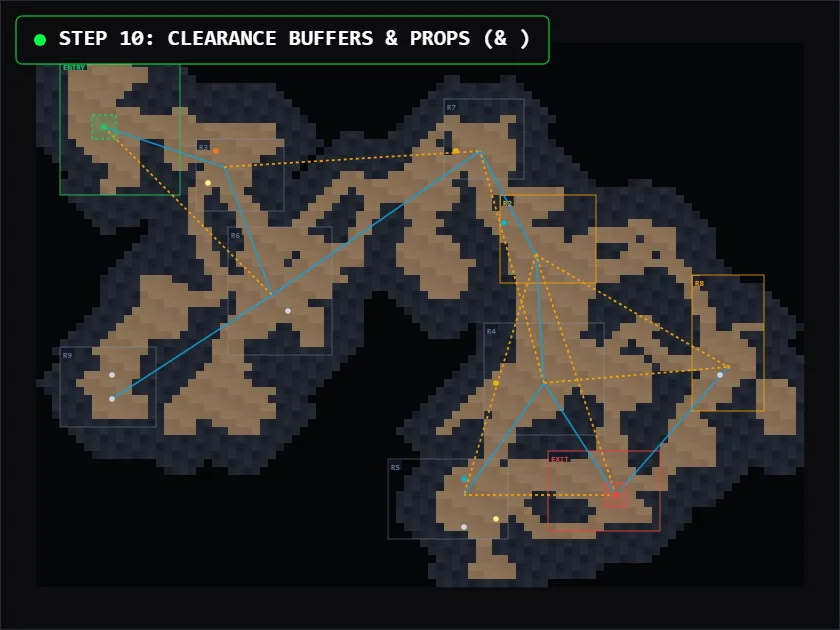
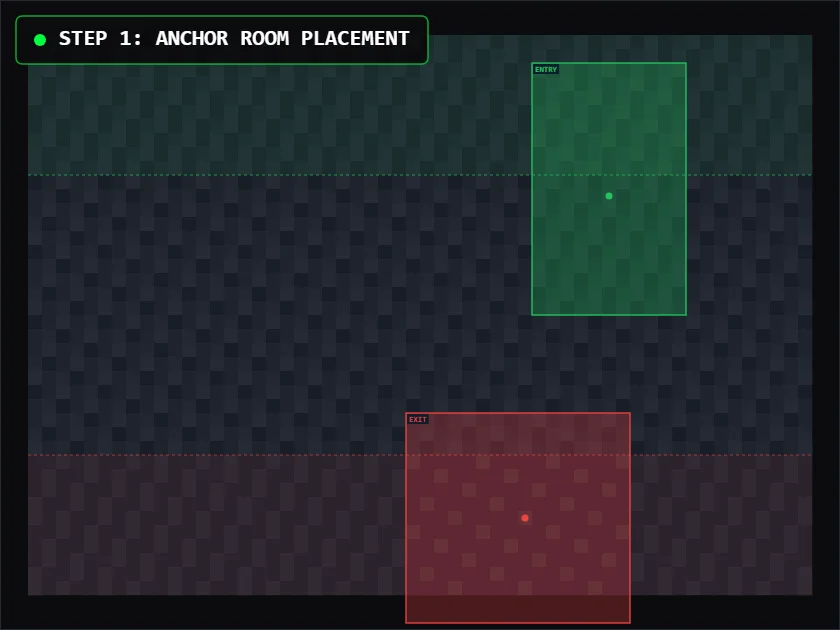
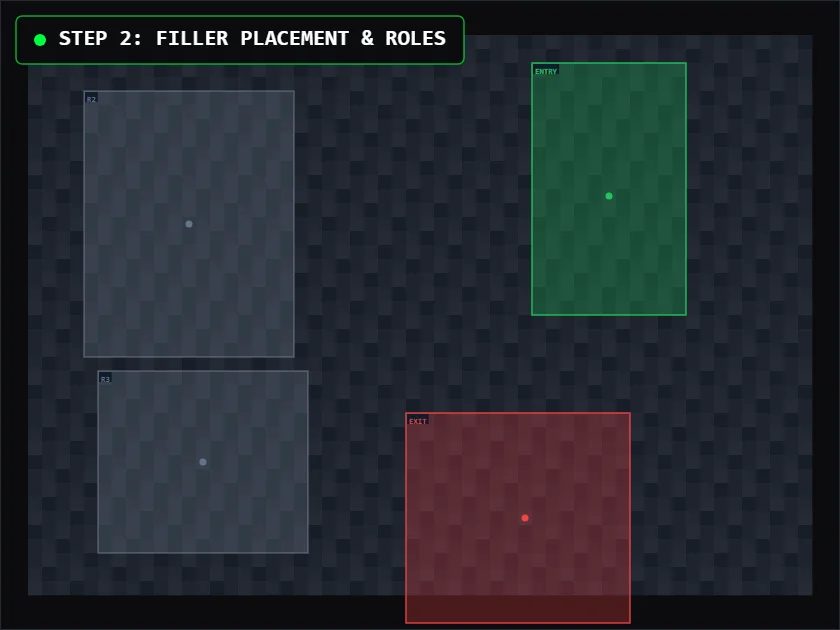
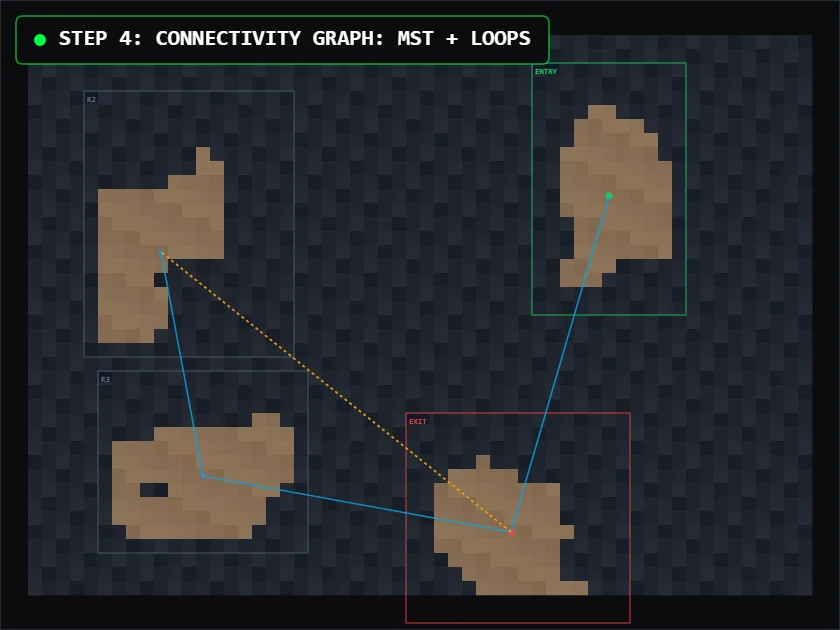
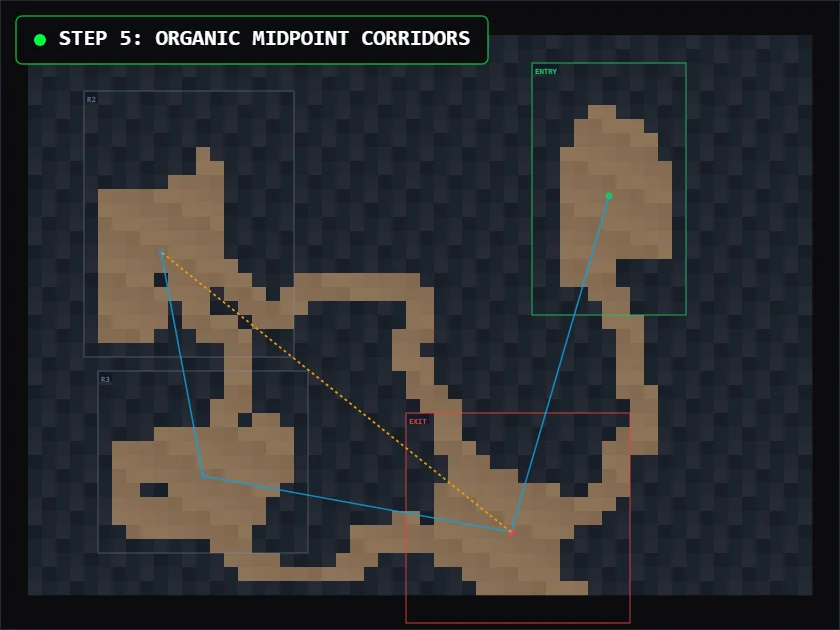
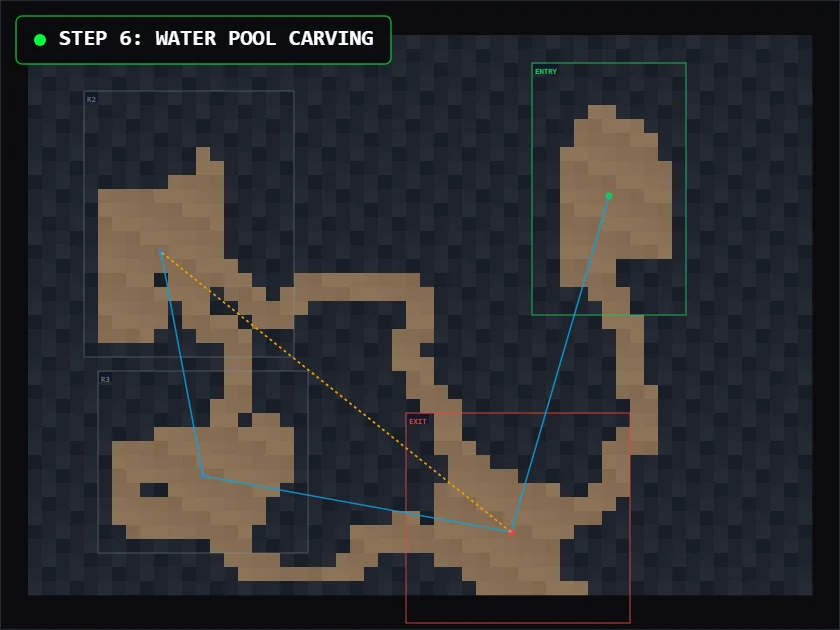
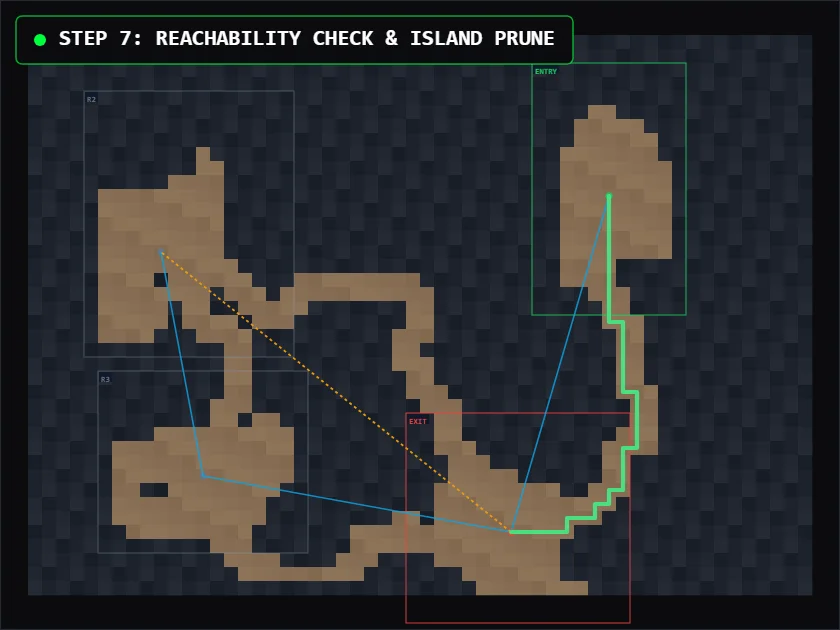
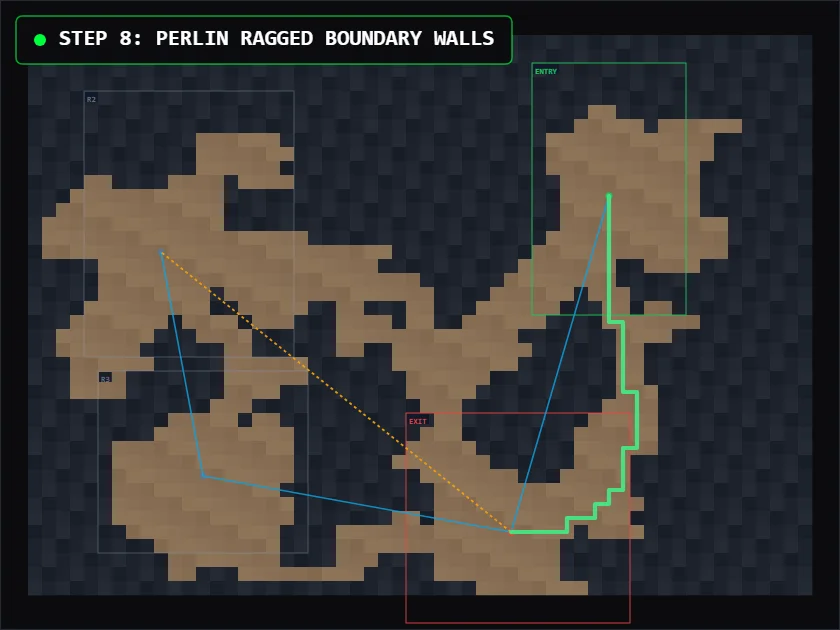
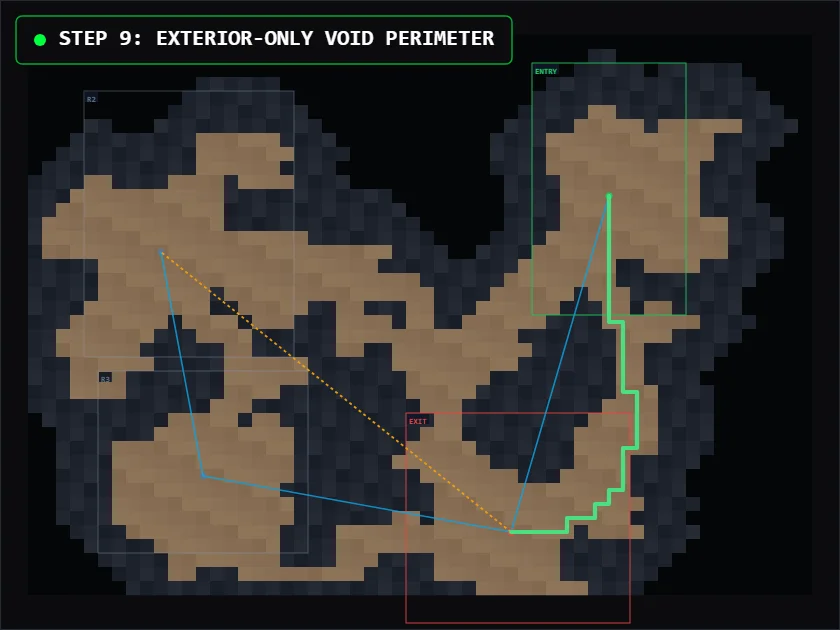
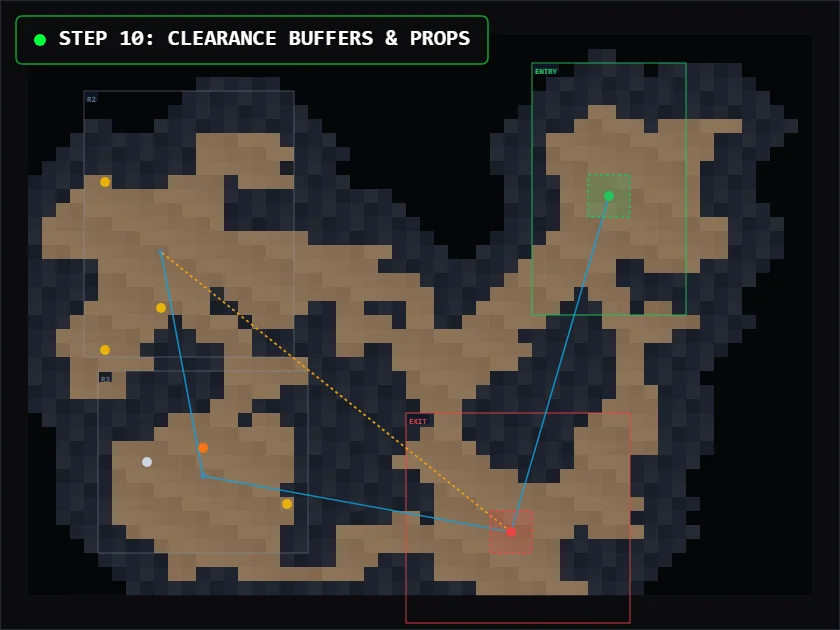
The exact deterministic floor generation pipeline breakdown.
The mine is initialized with a global seed that provides the deterministic base for generation.
The target depth selects the floor's position within the mine and determines which depth profile applies.
The profile defines the environmental and procedural characteristics of the floor, including space, resources, hardness and environmental features.
The mine seed and floor depth produce a deterministic seed for the individual floor.
The generator creates the floor's rooms and cavern shapes within the selected depth parameters.
Rooms are connected into a traversable network with winding corridors and alternate routes.
Resources, environmental features and other floor content are placed according to the active depth profile.
The completed floor receives its deterministic identity, allowing the same underlying floor to be reconstructed when revisited.
* The images shows the implementation level detail, steps may be different from the pipeline above
The system uses a RAM logic that dynamically holds up to 5 temporary generated floor in its memory to ensure that players should visit any temporary floor outside this memory, that floor is completely recreated using its depth profile. It’s the current floor plus the latest visited four floors.
Ooo, remember we told you about the dangers...? They sometimes lurk in the deep. But fret not! Our trustworthy Guild for Otherworldly Neutralization and Eviction (G.O.N.E) will notify you once you reach at a level that has a hazard beyond it whether it’s a toxic gas leak, flood or.. you know... Dermin swarm. Once you see the notification, kindly pay the fees for the heroic adventurers and wait for a day or two so they can fix your problem.
Players needed to feel the progression towards depth are earned and access should feel like reward rather than continuously progressing without any cost at all.
Treated hazardous descent points as global progression gates. Once an uncleared hazard is encountered, all further descent is blocked. Clearing the hazard through the appropriate mercenary contract records a persistent clearance flag that remains valid across sessions.
Exploration can be stopped for play time to get invested in other systems: Crafting and Shopkeeping.
The player tries to descend into a previously unresolved floor.
The system evaluates whether the floor contains a hazard.
If a hazard is present, further descent is blocked. The player can continue mining the accessible floor or return to the surface.*
The player returns to base and hires the appropriate mercenary group using the required payment and materials. Mercenary hiring occurs outside the active mining session.*
The cleared hazard is recorded globally. The gate remains permanently cleared for subsequent sessions, allowing progression to continue.
Note: A Hazard Gate ends forward progression, not the entire session.*
Three hazard categories can interrupt progression:
Alchemist mercenaries + required materials
Aarinaq(1)-related mercenaries + required materials
Adventurer mercenaries + required equipment/materials
Hazard probability is evaluated when the player first reaches an unresolved floor. After a hazard is encountered, the probability cycle resets before gradually increasing again with forward depth progression.
Floors from last hazard gate (cycle resets after encounter).
Relationship between the subterranean mine and the surface world economy: